How Easy Was That?!
This blog is a transcription of the "How Easy Was That" video introduced in an earlier blog post. We hope that this written version will help our non-English speaking users follow along and also those of you who prefer written instructions!
For reference, this is the original video:
Introduction
In this blog post I'll demonstrate how quick and easy it is to create a CloudTable for your application. We'll create a CloudTable that can manage the books in a library.
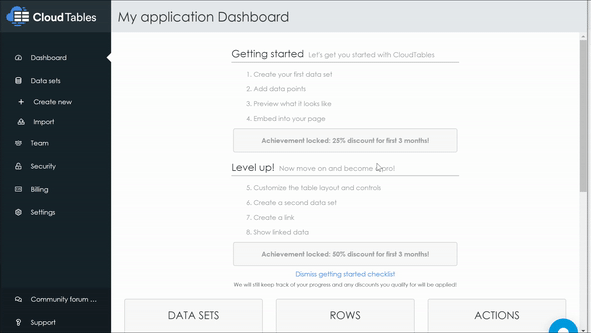
Getting started
First, go to the CloudTables home page and click on "GET STARTED", followed by "I AGREE - LET'S GO!". You have now created a CloudTables application.
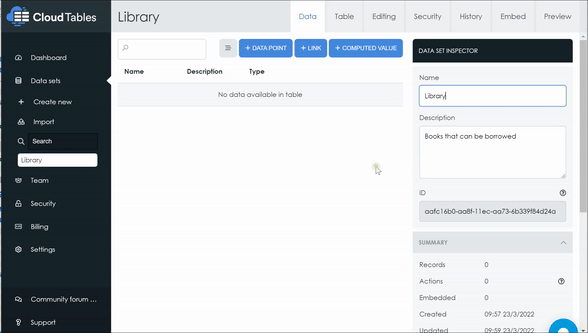
To create your first data set click on "Create new" on the left-hand menu.
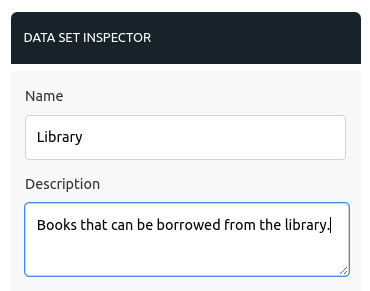
We'll give our data set a meaningful name, so let's call it "Library" and optionally add a description.
Create Data Points
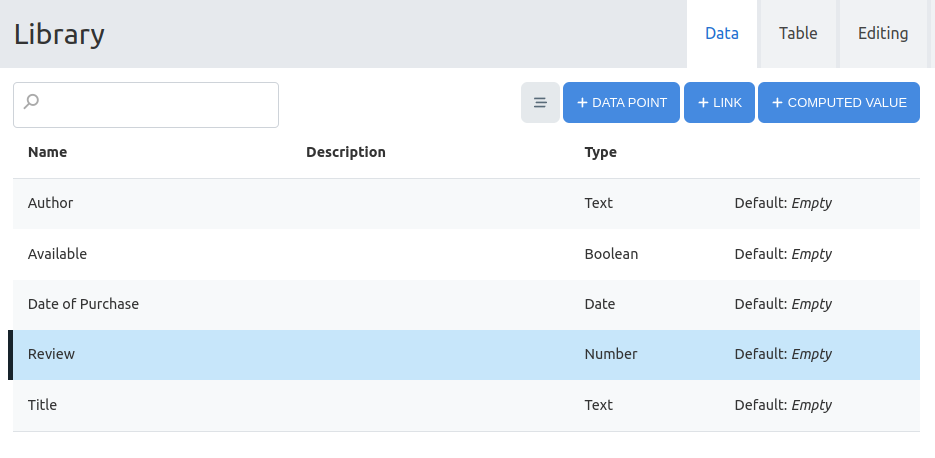
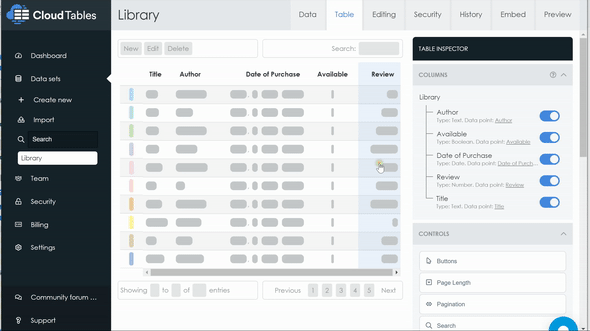
Books have attributes, such as the title and the date of purchase, and these are stored as "Data Points". We'll make the first data point the book's title, so this will be a "Text" field.
Click on "+ DATA POINT" and select "TEXT". Then give that data point a name, such as "Title".
That's our first data point created, so let's go ahead and create the rest. We'll add
- another text field for the name of the author - "Author"
- a date field for the date of purchase - "Date of Purchase"
- a boolean to signify if the book is available for loaning - "Available"
- a number for the Goodreads review score - "Review"
Organize the Table
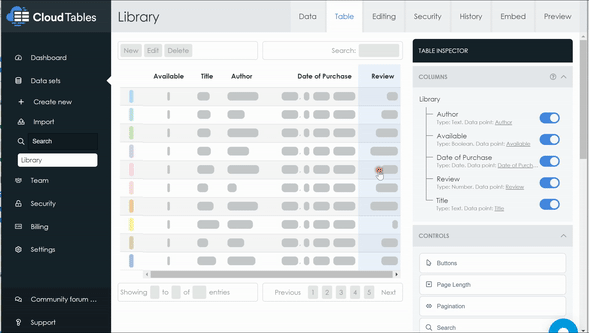
On the "Table" tab, you can reorder the columns. It might be useful to know first whether a book is available for loaning. So drag the "Available" column to the left-hand side.
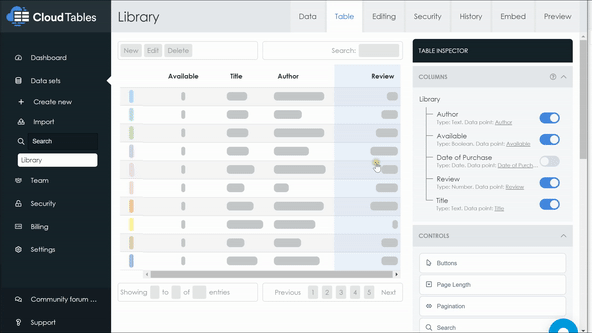
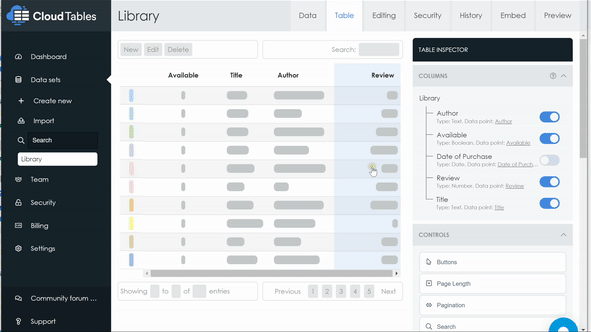
For you, the library administrator, it would be useful to know when the book was purchased, but this would be of less interest for people wanting to loan the book - so let's hide that data point from the table. To do this, unselect the "Date of Purchase" data point:
By default, CloudTables will order the table by the first column, but in our case this is now the "Available" data point. It would be more useful in our table to order by the "Title" field instead. Scroll down on the "Table Inspector" and change the ordering to be on the "Title".
We can change the "Review" field to be a colored bar to make it more visually appealing. Goodreads reviews go upto 5, so let's make that the top value. To do this, click on the "Review" data point in the wire frame, and modify as per the image below:
We've done a lot of work here, so let's click on the "Preview" tab to see how the table would look. CloudTables detects which styling library is in use on your website, and styles the table accordingly. You can change the style by hand on the "Preview" tab by clicking one of the styling libraries on the right-hand side.
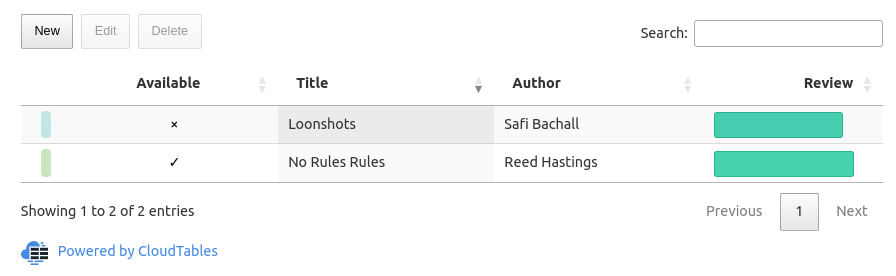
Why don't you go ahead and create a couple of rows, as shown in the image below:
Embedding a CloudTable
The CloudTables application is for you, the administrator, to set up the table and how it behaves. Other users would use a web page instead. This is done by embedding the CloudTables into an HTML page.
The information to do this is stored on the "Embed" page. To make this secure, so that only the user requesting page can see it, you would normally use tokens. For this example, we'll keep it simple and use "Serverless" - this is recommended for a production site but is fine to test out your application.
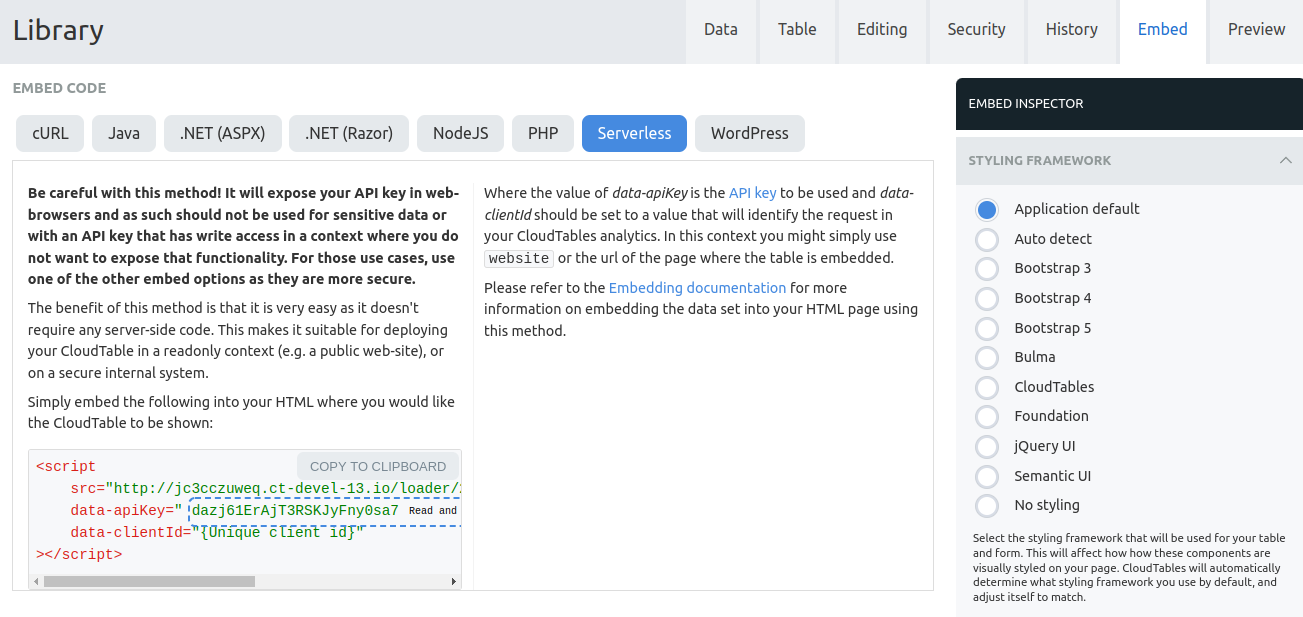
Press "COPY TO CLIPBOARD" to get the <script> tag. You can either paste this into a local HTML file, or perhaps into the HTML section of a sandbox site like JSFiddle, as shown below. When you press "Run" you'll see how the table will appear inside your web page.
Summary
As you've seen, it's very easy to create and embed a CloudTable. I hope this has been useful - don't hesitate to get in touch if you have any questions or comments!
© 2022 CloudTables designed and created by SpryMedia Ltd.
SpryMedia Ltd is registered in Scotland, company no. SC456502.
Terms of Service | Privacy Policy.