Customs Buttons - a button to trigger your code
Introduction
In a recent blog post, I gave an example of how the DataTables API can be used to enhance your table. In that example, the code triggered on page load, but often you'll want to trigger an action based on a user action.
Custom buttons provide a control, styled like the other buttons for your table, that can trigger your code when pressed. This simple example triggers the selection of the "London" rows in the table, but the ability to run your own function means the table can be more fully integrated with other components on your site.
Example
If you like to follow along with a video, see below, otherwise, keep reading!
Breakdown
Some good news, the method to do this is very simple, so this will be a short post!
CloudTables configuration
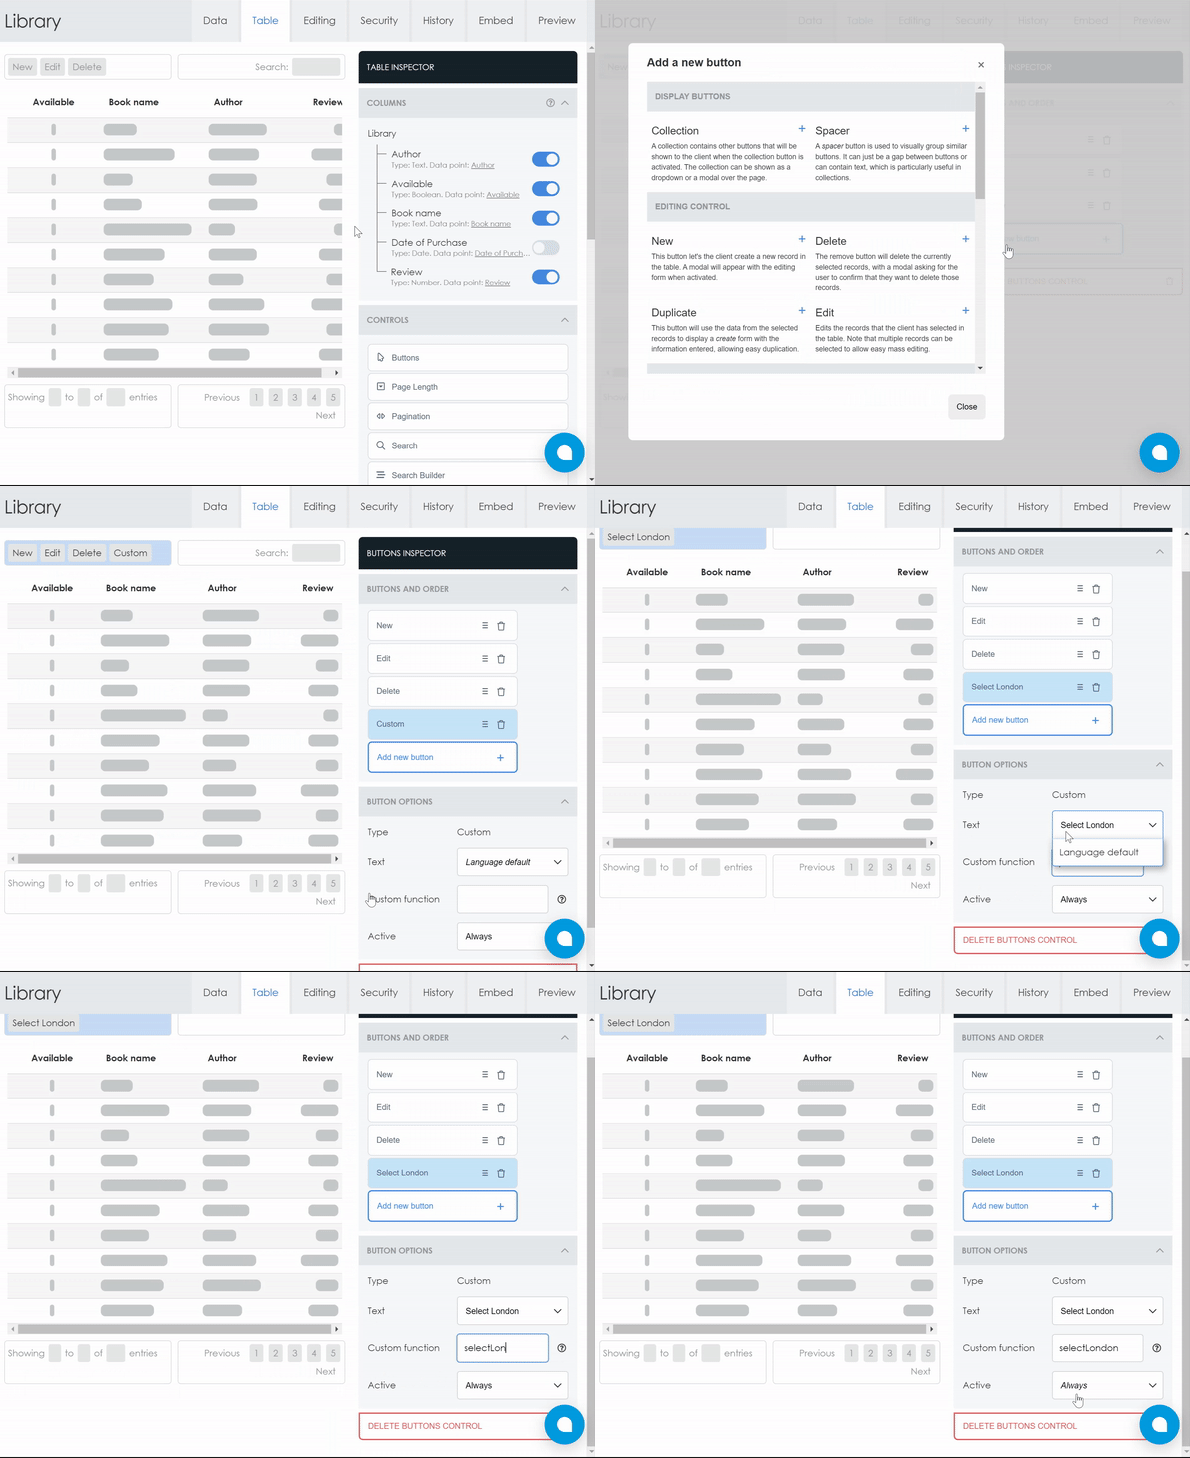
The first thing to do is to add the custom button to your table. Go to your data set's Table tab, and either create a new button group by dragging "Buttons" from the Table Inspector into your table, or select an existing button group. Then click on "Add new button" and click on the "Custom" button option. Now that the button is added, we can configure it.

"Text" is the string you'll see on the button. "Custom function" is the function to be called. "Active" determines when the button is active, i.e. clickable.
Adding the custom function
The next step is to create the function. Please note that this must be a valid Javascript function and be globally accessible (i.e. be on the window object).
The function's signature is defined in the DataTables Buttons reference page.
Method 1
This method is the one that was demonstrated in the video linked above. It uses DataTables functions such as rows() and row().data().
It's worth noting here that dp-44 in the code below is the id of the data point. You can find the id of each data point in the CloudTables app by clicking on the data point on the Data tab and checking the Data Point Inspector panel.
function selectLondon(e, dt, node, config) {
    // Iterate over all the rows in the table
    dt.rows().every(function(idx) {
        // Get the data for this row, extracting the Office data point
        var data = JSON.parse(this.data()['dp-44']);

        if (data[0].text === 'London') {
            this.select();
        }
    });
}
Method 2
While the above code works well, it may not be the most efficient for large data sets. The DataTables API has been developed over a decade, and its flexibility allows many ways to achieve the same goal.
In this version
- a function is used as the row-selector for the rows() method.
- the data point,
dp-44, isn't referenced here, instead cell().render() uses the data that has already been rendered into the table.
function selectLondon(e, dt, node, config) {
    dt.rows(function(idx) {
        var data = dt.cell(idx, 4).render('display');
        if (data === 'London') {
            dt.row(idx).select();
        }
    });
}
Summary
That's it! Very easy to add, but it allows you to bring custom functionality to enhance your CloudTables. As always, please get in touch if you have questions or comments, or would like to see another area discussed in a future blog post or video.
